Nano’s server installation – Part 2

Hello friends,

I am back and today, we will continue talking about Nano’s server installation.
As I mentioned in the last article, we will learn how to configure the NIC interface, I would also like to show you how to open firewall’s ports. We will test our IIS server as well.

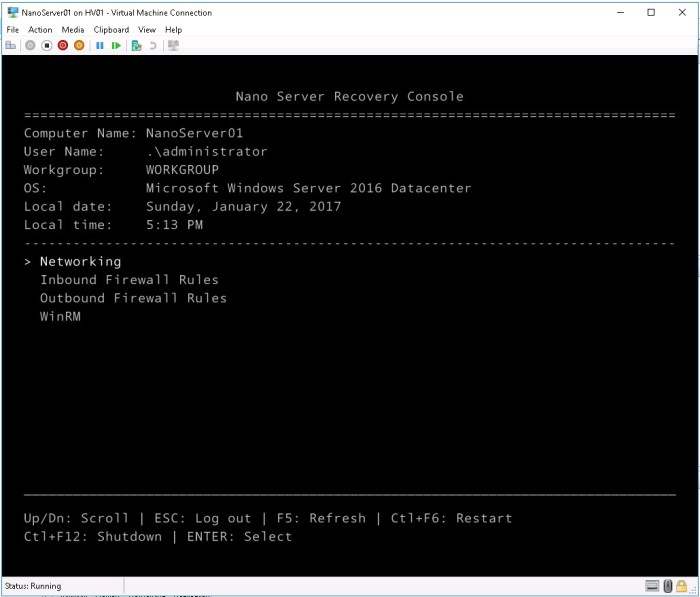
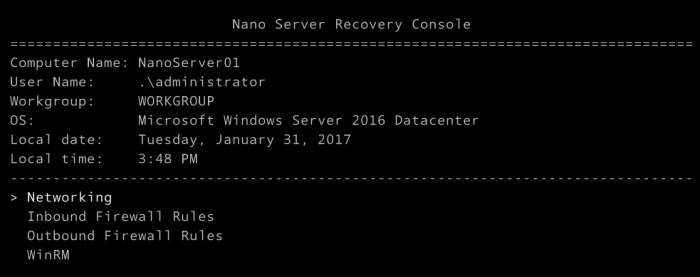
First thing, in the Nano server recovery console, we have to configure the NIC adapter. Select Networking and press enter.

01_windowsserver2016-installingnanoserver-part-2

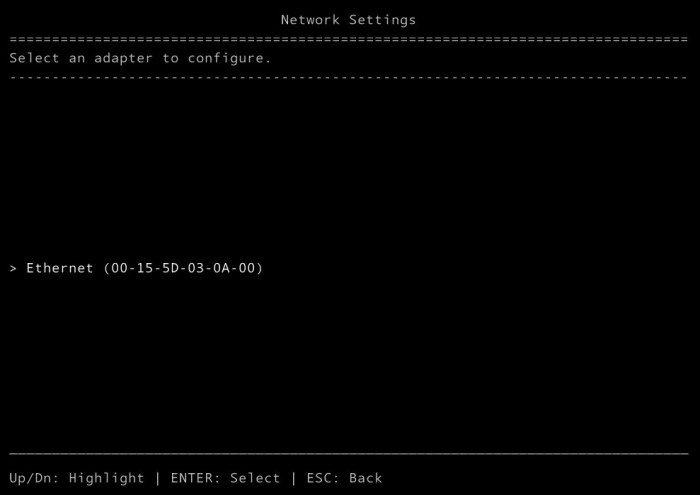
Now, you should see a network adapter available to be configured. Select it and then press enter.

02_windowsserver2016-installingnanoserver-part-2

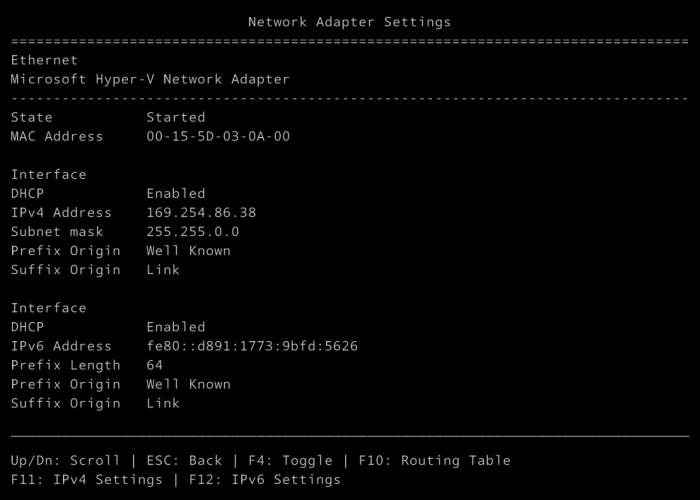
You will see detailed information about the NIC adapter. Information like state, MAC Address, if the NIC adapter is using DHCP or it is configured with a manual IP address. You will also see the subnet mask, DNS servers, and driver’s information as well. Check that all commands available to manipulate the NIC adapter are present on the screen’s bottom.
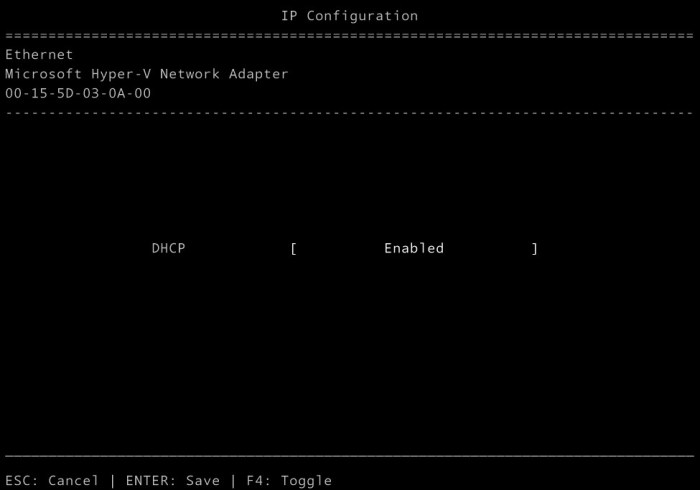
In this example, I will show you how to configure IPv4. To do it, press F11 to enter on the IPv4 settings.

03_windowsserver2016-installingnanoserver-part-2

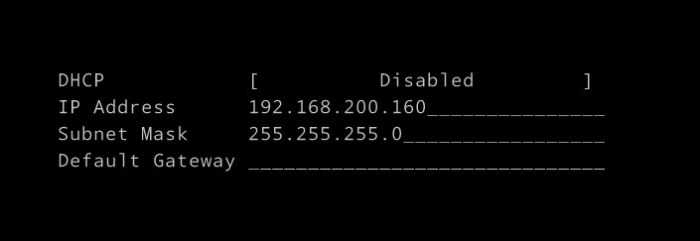
Now, press F4 to switch the NIC configuration from DCHP to manual.
Put the IP address according your network.

04_windowsserver2016-installingnanoserver-part-205_windowsserver2016-installingnanoserver-part-2

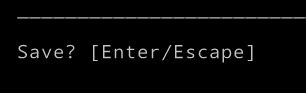
Press Enter to saving changes. You will be demanded to save, press enter again

06_windowsserver2016-installingnanoserver-part-207_windowsserver2016-installingnanoserver-part-2

That’s nice! You have done the NIC adapter’s configuration. Press ESC twice and you should be back on the home screen. Now, we will send ping packets from the Hyper-V host to check if the IP configuration is working well. But first, we have to enable the Nano to reply to ping requests. Go to Inbound firewall rules and press enter.

08_windowsserver2016-installingnanoserver-part-2

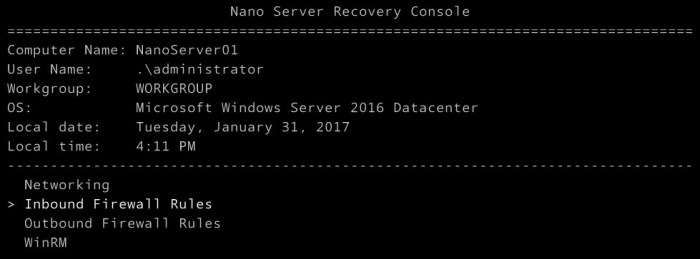
On the firewall rules’ screen, we will enable two inbound rules.

  • File and Print Sharing (SMB-In) – To enable the port TCP 445 that will be used to connect to \\nanoserver01\c$
  • File and Print Sharing – (Echo Request – ICMPv4-In) – To enable Nano Server 01 to respond to ICMP request.

Enter in which firewall rule and press F4 to enable the specific rule. You will see the field Enabled will be changed from No to Yes.

This slideshow requires JavaScript.

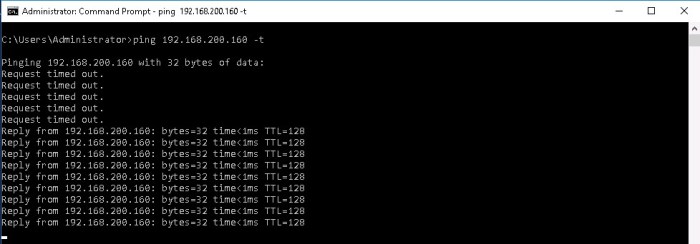
Leave a command prompt pinging to our nano server.
When the rule “File and Print Sharing – (Echo Request – ICMPv4-in) has been enabled, replies will be shown on the prompt command.

12_windowsserver2016-installingnanoserver-part-2

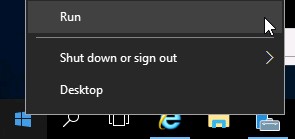
On the Hyper-V server, right-click on windows menu and then click in Run.

13_windowsserver2016-installingnanoserver-part-2

Type \\192.168.200.160\c$ .It should open the remote administrative share from our nano server.

14_windowsserver2016-installingnanoserver-part-2

15_windowsserver2016-installingnanoserver-part-2

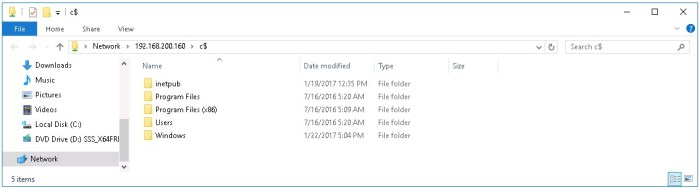
Now, let’s go to C:\inetpub\wwwroot and create a TXT file.

16_windowsserver2016-installingnanoserver-part-2

Put the code bellow on the txt file and save it as default.htm.

<p>Patrick Albuquerque<br />Nano’s server installation</p>
<p><a href=”http://patrickdbarros.com”>http://patrickdbarros.com</a></p&gt;
<p>31/01/2017</p>

17_windowsserver2016-installingnanoserver-part-2

Let’s open the Internet explorer. Now, type the nano’s server ip address on the url box.
http://192.168.200.160. That’s A-W-E-S-O-M-E!

18_windowsserver2016-installingnanoserver-part-2

In this article, you have learned how to configure the NIC adapter on the nano server recovery console. You were able to configure firewall rules to allow network traffic like SMB and ICMP. You were also able to create a simple html file to validate our IIS installation.

I hope it helped you to understand a little bit more about this new windows server operating system. If you have questions or suggestions, leave a comment or e-mail me.

See you soon.

Nano’s server installation – Part 1

Hello friends,

I am back and today, I will talk a little bit more about Nano server. In this article, I will show you a step-by-step process to deploy it. I would also like to explain how to add packages and further discuss details about Powershell cmdlets used to deploy it. The installation and configuration will be divided in two articles. This is the first part! Let’s get start.

The first step to install Nano server is to “get the Windows Server 2016 ISO” on the Microsoft Download Center. In order to find it, just google Windows Server 2016 and a download link can be obtained easily.

Once you got the ISO media, mount it and go to CD Drive:\Nano Server folder.

screenhunter_599-jan-19-16-46

In this folder, you will find two sub folders. The first one is NanoServerImageGenerator.
In this sub folder, you will find the Powershell scripts needed to deploy a Nano server vhd.

screenhunter_600-jan-19-16-46

The second sub folder is named Packages. Everything that you want to add in a Nano Server installation will be found in this folder. For example, if you want to deploy a Hyper-V Server, open a Powershell console,  go to \Packages, then lastly, run a Powershell cmdlet in order for the Hyper-V Server Role to be installed.

screenhunter_601-jan-19-16-47

Another two files will be found on NanoServer folder:

  • wim – this file contains a base image for a Nano Server.
  • txt – it is just an informational file.

Let’s get started and install the Nano Server

Open a Powershell console as administrator and run the following cmdlet

screenhunter_602-jan-19-17-00

It will import the NanoServerImageGenerator module.
The parameter “-verbose” is just to verify which news cmdlet are available.

We will use “New-NanoServerImage” cmdlet to install our first Nano server. I will also likewise explain all parameters used in this example. Bellow the complete cmdlet.

New-NanoServerImage –MediaPath ‘D:\’ –TargetPath C:\VMS\NanoServer01\NanoServer01.vhd –Edition DataCenter –DeploymentType Guest – ComputerName NanoServer01 –Package ‘Microsoft-NanoServer-IIS-Package’

screenhunter_604-jan-19-17-36

  • New-NanoServerImage – cmdlet needed to deploy a Nano server.
  • -MediaPath – you should specify the location of Windows server 2016 installation media.
  • -TargetPath – folder location where the Nano’s server vhd file will be save.
  • -Edition – Choose the Operating System version edition desired.
  • -DeploymentType – you can select guest or host, if you select guest it means the Nano server will be placed in a Hyper-V host. If you choose Host, it means Nano Server will be installed in a physical machine.
  • -ComputerName – to determine Nano’s server name
  • -Package – to specify which additional package will be installed.

After some minutes, the installation will be done. Let’s go to the target folder that we used in our example and let’s check the vhd file. As we can see from the screenshot below, the vhd file has less than 500 MB.

screenhunter_626-jan-22-21-49

Once we have the vhd done, let’s attach it and create a new virtual machine in our Hyper-V Host.
Open a Powershell and type the cmdlet bellow.

screenhunter_628-jan-22-22-01

Finally, let’s start our Nano server

screenhunter_629-jan-22-22-04

Open Server Manager console, click in Tools and then select Hyper-V Manager. You will see that our Nano Server will be already started. Right-click on NanoServer01 and then click on Connect…

screenhunter_630-jan-22-22-07screenhunter_631-jan-22-22-11

Here we are! Now you can see the “Nano Server Recovery Console”, write down the credentials and login!

screenhunter_632-jan-22-22-13

Now you have already been logged in on our Nano server.

screenhunter_633-jan-22-22-14

In the next post we will configure the network interface, configure the firewall to open some TCP ports, validate the IIS installation and use Powershell to manage this VM.

I hope this article help you to understand a little bit more about Nano’s Server deployment and how it works. If you have questions, feel free to send me a message. It will be my pleasure!

See you in the next post “Nano’s server installation – Part 2”

Windows Server 2016 – Hyper-V cannot be installed: The Processor does not have required virtualization capabilities

Hello Friends,

Nowadays virtualization has an important role in IT. We need this to validate an upgrade path, to deploy new scenarios or just to do experimental things in a lab environment before putting it in a Production network.

While I was setting up my lab environment to deploy Hyper-V on Windows Server 2016, I got the following error message:

“Hyper-V cannot be installed: The Processor does not have required virtualization capabilities”

hypervcannotbeinstalled01

I am using Windows Server 2016 on an ESXi 6 Hypervisor.

To “fix” this issue, we have to edit the VM configuration on vCenter.

Go to vCenter WebClient and then right click on the Virtual Machine and select Edit Settings…

Once opened, expand CPU settings and then mark the check box “Expose Hardware assisted virtualization to the guest OS”.

This feature is needed to run a new layer of hypervisor inside the guest OS.

hypervcannotbeinstalled02

Then click ok and afterwhich, the Hyper-V server role installation should be done with success.

See you in my next post.

Windows Server 2016 – Nano Server

Windows Server 2016 is coming and we have a new installation option to deploy the new Microsoft’s server system. I am talking about Nano server. However, what is Nano server and which are the best scenarios to deploy it?

Nano Server is a cloud based Windows Server without Graphical User Interface.
Ok Patrick but Windows Server 2008 has already launched the Server Core that is a Windows server version without Graphical User Interface, are they similar?

The answer is DEFINITLY NO!

Nano server is a small, modern, fast and safe operating system designed for the cloud.
A single Nano’s server installation has less than 500 MB, it has just 11 ports opened and less binaries, it means the number of vulnerabilities was reduced significantly. With fewer reboots and critical patches to install, Nano Server is a perfect operating system to an IT infrastructure modern and scalable.

For example, DevOps that use Chef or puppet to control their cloud infrastructure can now add and manage Nano server to increase the workload of their Apps as well.
Some roles like Hyper-V, IIS, DNS and a storage host for Scale-Out File Server are perfect to be hosted in a Nano server.

On the other hand, Active Directory cannot be deployed as a role in Nano server, and we cannot use GPO to control it. However, we can use Desired State configuration to apply settings.

To manage a Nano server we can use tools like Hyper-V Manager, MMC, WMI, PowerShell, Server Manager, System Center, Puppet and Chef.

Since Nano server is new for Windows Server 2016, there is no available upgrade or migration path from older versions to Nano server.